
The Windows 7 team have introduced a new feature in Windows Explorer called Libraries. Libraries are a collection of indexed folders, such as Documents, Downloads, Music, Pictures, and Video libraries. In these libraries, you can group files that are stored anywhere on your computer or even externally, and view them all in one experience without physically copying or moving any files.
Let's take a look at the Documents library and see what features are new. In the Documents library folder, there is a new Documents library pane at the top of the window where you can rearrange the folder structure.
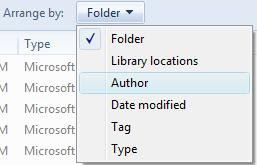
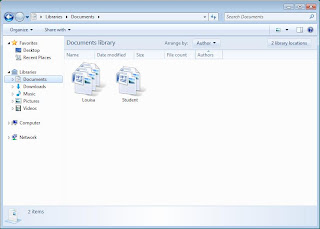
If you were looking for documents created by a particular author, you can choose to arrange your folder structure by Author, and hey presto, the Documents library window stacks all your files by author.
This is great, but what else can it do? And how can this help me? Well for me, saving documents to the desktop is an easy way to open and grab files when I need to, I’m unorganised I know! In Windows 7 tidying up messy documents is easy; you can simply drag them from your desktop for example, and drop them into the Documents library window, and when in the Arrange by Author category, Windows Explorer creates the new author stacks.
You do need to make sure that you remember to add relevant document details such as the author etc in order for the, arrange by filters to be most useful.
You can switch back to the Arrange by Folder view, which is a classic view, to look at a list of your folders, or choose from other views that are most appropriate to your needs.
You can manage folders in your library by clicking the Library Locations button. I want to view a collection of all my music in the Music library, so the first step would be to click Library Locations in my Music library window.
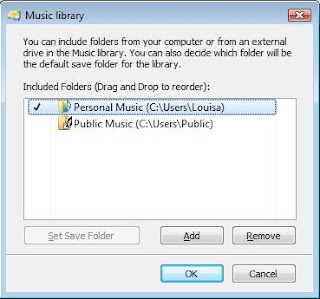
For those of you that store music on a secondary partition, or an external drive, or both, can now have access to all your music in one place without copying everything into the one folder. Simply click Add, and then navigate to the required folder / drive that your music is stored on. Now in your Music library folder, you will see a collection of all your gathered music. You can do everything with your music that you could do before, click play, click next / previous, and listen to songs.
Unfortunately if you disconnect your external drive from your PC, you will be unable to continue listening to music in your Music library, this is a little annoying, but if your music is stored on your computer somewhere or on another partition, as long as you have established the location, you can still listen to your music in the Music library.
The same principle applies to all your libraries including any new libraries that you want to create, you can gather documents or videos etc from anywhere on your computer by adding folder locations to your desired library.
Homegroup
Setting up a homegroup in Windows 7 does not require any of the hassle and technical knowledge that is required to set up sharing in Vista. Once you have configured homegroup, you can view homegroup members in Windows Explorer, and here you can drag and drop files into the folders of members who are connected to your homegroup. This is a fantastic way to share files, and it’s easy. You don’t even need to worry about permissions, as Windows 7 have developed the Windows Explorer so that you have private and public libraries.
Before you go ahead and set up a homegroup network, your home computers network location should be set to Home network. Follow these simple steps to set your Windows 7 home computer network location to Home network: -
Setting the Network Location
- Click the Start menu.
- Click Control Panel.
- Click Network and Internet.
- Click Networking and Sharing Centre.
- In the View your active networks section, underneath your network name, click on the network location link.
- In the Set Network Location dialog box, click Home network.
Your network location is now a Home network, and you can set up a homegroup network.
Setting up a homegroup network is also simple, you can set up a homegroup network on a Windows 7 computer at home, by following these simple steps: -
- Click the Start menu.
- Click Control Panel.
- Click Network and Internet.
- Click Networking and Sharing Centre.
- In the Change your network settings section, click Set up sharing with homegroup.
- In the Do you want to create a homegroup? window, click Create now.
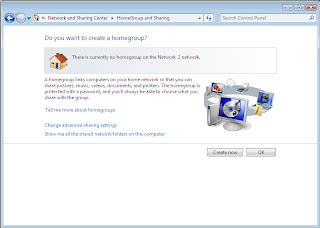
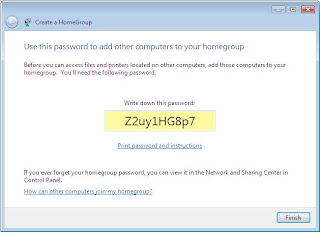
- In the Create a HomeGroup window, select the library check boxes that you want to share out, and then click Create now.

- In the Use this password to add other computers to your homegroup window, jot down the password, and then click Finish.
You have now successfully created a homegroup network!
Finally, you now need to set up other home computers so that the network locations are set to Home network. By doing so, this will enable you to be able to join the homegroup network that you just created. Follow the Setting the Network Location steps above to set your other home computer network location to Home network.
Joining a Homegroup Network
- Click the Start menu.
- Click Control Panel.
- Click Network and Internet.
- Click Networking and Sharing Centre.
- In the Change your network settings section, click Set up sharing with homegroup.
- In the Do you want to join a homegroup? window, click Join now.

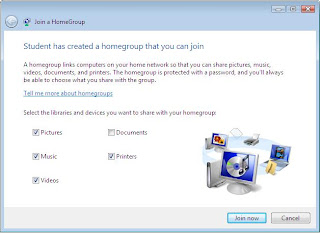
- In the Computer name has created a homegroup that you can join window, select the library check boxes that you want to share, and then click Join now.
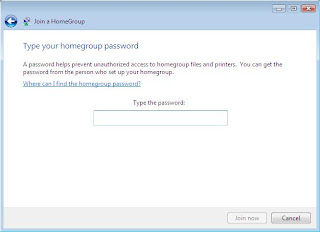
- In the Type your homegroup password window, type the homegroup network password, and then click Join now.
- In the You have joined the homegroup window, click Finish.
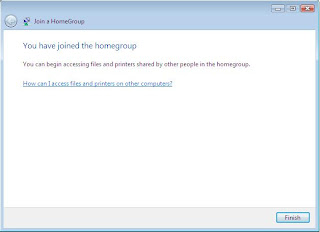
You have now successfully created and joined a homegroup!
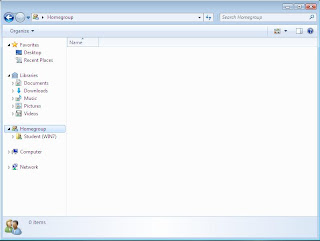
To get sharing, open Windows Explorer, and in the navigation pane, click Homegroup. You can now click on the user in your homegroup, open / edit / delete documents (if these permissions are enabled) and even drag and drop documents into homegroup user's folders.
Homegroup is a great way to share you files, and also be more in control. You may notice that the folder structure in Windows 7 differs from that of previous windows OS's, and this is all to do with homegroups.
In Windows Explorer, you have private and public folders for all your libraries. Both folders have different permissions set so that you can manage them in the correct manner. You can also customise them so that the permission settings are exactly what you want. This means that you can make sure your personal folders are kept personal, and you public folders are kept public.
I think that libraries and homegroup are great additions to the new Windows OS, they make the experience much more user friendly and now anyone can use libraries and set up a homegroup and get sharing straight away.
I will be taking a look at Internet Explorer 8 next and I will be posting some more blogs and keeping you updated on what's new :)

No comments:
Post a Comment