Tuesday 28 December 2010

Creating a User-Defined Server Role in SQL Server “Denali”

“Denali” is the code-name for the next release of Microsoft SQL Server, and a community technology preview (CTP) is available for download from here. My colleague Geoff Allix has already posted a couple of articles about the enhancements Denali includes for debugging Transact-SQL scripts here and here, and as the Content Master data platform team continues to investigate the CTP, I’m sure more posts will appear. In this post, I want to discuss a new feature that makes it easier to delegate server-level administrative tasks – user-defined server roles.

If you’re familiar with previous releases of SQL Server, you’ll know that there are essentially two levels of security principal within SQL Server (well alright, 3 if you include the operating system) – server-level principals, such as logins, and database-level principals, such as users. Permissions can be granted to these principals in order to allow them to use or manage resources (generally known as securables) at the relevant level. For example, you can grant permissions on server-level securables (such as endpoints and certificates) to server-level principals, and you can grant permissions on database-level securables such as (tables and views) to database-level principals. Obviously, managing permissions for individual principals can become complex (and error-prone) as the number of principals increases, so in common with most software systems, SQL Server supports the idea of grouping principals into roles, enabling you to grant the required permissions to the role, and simply add or remove principals from the role in order to allow or disallow them access to the securables.

So far, so ordinary.

Previous releases of SQL Server included a pre-defined set of server-level roles and database-levels roles that are already granted commonly required permissions, and to which you can simply add your principals (for example, logins at the server level or users at the database-level) in order to quickly enable people to access the resources they need while maintaining the principle of “least privilege” (i.e. not granting any permissions to anyone who doesn’t require them). Additionally, you can create your own user-defined database-level roles but crucially, until SQL Server “Denali” you could not create your own user-defined server-level roles.

To understand how the ability to create and manage your own server-level roles is useful, let’s consider a scenario where a corporation uses a SQL Server instance to host multiple application databases. Many of these databases are used by internal “home grown” ASP.NET Web applications or client/server applications that use Windows integrated authentication, and to control access to these databases, the DBA has simply created logins in SQL Server for the appropriate Windows Active Directory groups. However, the environment also includes a couple of off-the-shelf applications that do not support Windows-integrated authentication, and therefore require their own SQL Server logins. Let’s also suppose that these applications are supported by team of dedicated application administrators who need to be able to manage the SQL Server logins for the applications, for example to periodically change the password.

To accomplish this, I can create a user-defined server role by right-clicking the Server Roles folder in SQL Server Management Studio and clicking New Server Role, as shown below. Alternatively, I can use the new CREATE SERVER ROLE Transact-SQL statement.

Picture1

Using the SQL Server Management Studio UI reveals the New Server Role dialog box, enabling me to define the server role. In this case, I want to create a role named SQLAccountsAdmin, which will be owned by the built-in sa login. I can also specify the server-level securables I want to assign permissions for, and I can select each securable and set the required permissions. In this case, I’ve selected the AcctsPackage and AppSvcAccount logins (yes, principals can also be securables!) and granted the full set of available permissions on these logins to the SQLAccountsAdmin role.

Picture2

To grant permissions to a user-defined server role by using Transact-SQL, you can use the GRANT, DENY, and REVOKE Transact-SQL commands just like you would for any other server-level principal.

Now I need to add some server-level principals to the role, so that they can use their role membership to gain the permissions required to manage the two SQL Server logins. You can do this on the Members tab of the dialog box or by using the ALTER SERVER ROLE Transact-SQL statement.

Picture3

Finally, it’s worth noting that you can nest user-defined server roles within other server-level principals, including the fixed server roles provided out-of-the-box by SQL Server. In general, I’d advise against this as you can often find yourself granting unnecessary and unintended permissions, but it’s shown here for completeness.

Picture4

So, there you have it – user-defined server roles in SQL Server “Denali” provide a flexible way to delegate administrative tasks at the server-level.

Friday 24 December 2010

Installing SharePoint 2010 on Windows 7

I generally do most of my development and “technology exploration” in an environment that reflects the actual production environment as closely as possible – for example, by developing against multiple virtual servers running Windows Server 2008 in a domain configuration. This approach has the advantage of reducing the opportunity for “well, it works on my laptop” style configuration issues when trying to deploy the application into production, but, let’s be honest, it makes life difficult – especially when the “real world” configuration requirements are as onerous as those of SharePoint-based solutions.

Microsoft has documented a way to deploy SharePoint 2010 on a single Windows 7 (or Vista if you prefer) development box, so when I recently needed to do some basic SharePoint development, I decided to ignore my existing virtualized, multi-server SharePoint development and testing environment, and try out Microsoft’s instructions for creating a single-box development environment. For the most part, this went OK, but I did hit a few issues along the way, so I thought it might be useful to document my experience.

First, I installed Windows 7 (64-bit, since SharePoint is 64-bit only!) and then downloaded Microsoft SharePoint Foundation 2010. The download is an executable named SharePointFoundation.exe, which you can simply run if you intend to install on the supported Windows Server platform, but which you need to extract to the file system in order to install on Windows 7 (or Vista). For example, to extract the installation files to a folder named C:\SharePointFiles, I used the following command:

SharePointFoundation /extract:c:\SharePointFiles

Next, I needed to edit the config.xml file provided with the SharePoint files, and add a <Setting> entry to enable installation on a client OS, as shown below:

Picture1 

The SharePoint installation files include a tool to automatically install and configure SharePoint prerequisites, but this only works on the supported Windows Server OS – you can’t use it on Windows 7, so you need to install and configure the prerequisites manually. The first of these is the Microsoft Filter Pack, and it’s included in the extracted files, as shown here:

Picture2

Links to the remaining prerequisites are in the Microsoft documentation, and I simply downloaded and installed the ones I required for SharePoint Foundation on a Windows 7 machine (which included the Sync Framework, the SQL Server 2008 Native Client, and the Windows Identity Foundation).

Next I needed to enable all of the IIS features that SharePoint requires. Microsoft provide the following command, which you can copy to a command prompt window (on a single line) and execute.

start /w pkgmgr /iu:IIS-WebServerRole;IIS-WebServer;IIS-CommonHttpFeatures;
IIS-StaticContent;IIS-DefaultDocument;IIS-DirectoryBrowsing;IIS-HttpErrors;
IIS-ApplicationDevelopment;IIS-ASPNET;IIS-NetFxExtensibility;
IIS-ISAPIExtensions;IIS-ISAPIFilter;IIS-HealthAndDiagnostics;
IIS-HttpLogging;IIS-LoggingLibraries;IIS-RequestMonitor;IIS-HttpTracing;IIS-CustomLogging;IIS-ManagementScriptingTools;
IIS-Security;IIS-BasicAuthentication;IIS-WindowsAuthentication;IIS-DigestAuthentication;
IIS-RequestFiltering;IIS-Performance;IIS-HttpCompressionStatic;IIS-HttpCompressionDynamic;
IIS-WebServerManagementTools;IIS-ManagementConsole;IIS-IIS6ManagementCompatibility;
IIS-Metabase;IIS-WMICompatibility;WAS-WindowsActivationService;WAS-ProcessModel;
WAS-NetFxEnvironment;WAS-ConfigurationAPI;WCF-HTTP-Activation;
WCF-NonHTTP-Activation

This enables the required features, which you can verify in the Windows Features Control Panel applet as shown below:

Picture3

Now I was ready to install SharePoint Foundation. I ran Setup.exe and chose the Standalone installation option:

Picture4

After installation is complete, I was prompted to run the SharePoint Product Configuration wizard, and this is where the wheels fell off! The Standalone installation of SharePoint includes the installation of a SQL Server 2008 Express database server instance (named SHAREPOINT) to host the configuration database, but somewhat annoyingly, you need to apply the Microsoft SQL Server 2008 KB 970315 x64 hotfix before you can run the configuration wizard. However, even after doing this, I still found that the SharePoint Products Configuration wizard failed to connect to the database server in order to create the configuration database. In desperation, I upgraded the SQL Server 2008 Express instance that had been installed to SQL Server 2008 R2 Express – still no luck.

My investigations resulted in finding a number of useful blog articles, which are listed below – none of these actually solved my specific problem, but they contain some really useful tips!

After some poking around, I discovered a command-line version of the configuration wizard in the C:\Program Files\Common Files\Microsoft Shared\Web Server Extensions\14\BIN folder named psconfig.exe, and by examining its parameter info I discovered a standaloneconfig value for the cmd parameter, as shown below:

Picture5

This seemed to solve my problem, and I now have a fully configured SharePoint Foundation 2010 environment on a Windows 7 virtual machine, as shown below.

Picture6

All-told, it took me the best part of an afternoon to create my “simple” SharePoint development environment – but to be fair, a large percentage of that was spent scrabbling around to try to figure out how to get the configuration wizard to work. Hopefully, your installation will go a little more smoothly!

Happy Holidays!

del.icio.us Tags:

Monday 6 December 2010

Another Cloud

Windows Azure and Amazon EC2

Having spent some time working with Windows Azure, I wanted to take a look at some of the other cloud environments out there to get a feel for how they work and how they differ in approach. The first platform I decided to take a look at was the Amazon Elastic Compute Cloud (EC2).

Amazon’s cloud offering is a little different from Microsoft’s — where Windows Azure is a platform and a specially designed framework that allows you to run specially written applications in the cloud, Amazon EC2 allows you to run standard operating systems virtual environments on Amazon’s servers. So two trade-offs spring immediately to mind:

  1. Windows Azure offers you a single fixed environment as against EC2’s almost completely free choice of operating systems (including Windows). Note that the latest Windows Azure release also includes Virtual Machine Roles in addition to the existing Web and Worker roles, so that you can run your own virtual machines in the cloud.
  2. The Windows Azure platform manages all the scalability issues for you (because of the features built in to the platform), whereas with Amazon EC2 you have to do a lot of the work if you want to build a scalable application that can run across multiple virtual machines. Although Amazon does offer an auto scaling service that can start up (or shut down) virtual machine instances for you based on demand, and a MapReduce service (for a description of the MapReduce algorithm and how to implement it in Windows Azure, see here) that’s designed to process large amounts of data on demand.

That said, there are a lot of similarities between the two platforms as I’ve outlined in the following table:

Windows Azure Amazon Web Services Notes
Content Delivery Network (CDN) Amazon CloudFront Both provide high-speed edge caches for static data, used for example to host video or other media for your cloud application.
Windows Azure Table Service Amazon SimpleDB Schema-less table storage.
SQL Azure Amazon Relational Database Service (RDS) SQL Azure is SQL Server in the cloud, Amazon RDS is MySQL in the cloud.
AppFabric Service Bus Amazon Simple Queue Service and Amazon Simple Notification Service Hosted queue services enabling  computers to exchange data through a cloud-hosted message hub.
Windows Azure Connect Amazon Virtual Private Cloud Creating virtual private networks that connect on-premises computers with your cloud instances.
Windows Azure Blob Storage Amazon Simple Storage Service (S3) Facility to allow you to store arbitrary data in the cloud.
Windows Azure Drive Amazon Elastic Block Store Storage that can be formatted and used like hard drives by your cloud application.


Daily News

Earlier this year I purchased a Kindle ebook reader which has been fantastic as a way to carry around books and reference material. However, one area that I was slightly disappointed with was the subscriptions to newspapers and journals that are available on the Amazon site. I soon found that I could generate my own news digests from just about any source by using an open source tool called Calibre. Once I customized the news feeds that I wanted to read on my Kindle, I can use Calibre’s command line interface to generate the file containing my news and email it direct to the Kindle. This is all great, except for the fact that I need to have the machine that generates the Kindle news feed using Calibre running. Most of the time it is running, but if on occasion I’m away from home without my laptop, it would still be great to get my daily fix of news delivered to my Kindle.

Calibre is very smart in the way that it generates ebooks containing news if you don’t mind doing a bit of python scripting, so I wanted to carry on using Calibre. Running Calibre on an Amazon EC2 virtual machine seemed like a good way to automate sending out daily news from an always on machine, so this gave me a reason to investigate how easy this would be to achieve with Amazon EC2.

Setting up my Cloud Machine with Amazon EC2

After signing up for EC2, the first decision was what operating system to use. Amazon currently has an AWS Free Usage Tier offer, which is only free if you use a Linux operating system, so Linux it was. However I was then faced with choice of several hundred different base virtual machines of various different flavours of Linux. Ubuntu seemed to be the most popular, and a bit of googling soon revealed which were the “official” Ubuntu machine images.

AMIs

Running my instance of Ubuntu on Amazon’s servers was a simple as selecting the base machine image and clicking the launch button in the web console (making sure I used a micro instance to make sure I stayed on the free usage tier). The Public DNS value is the machine’s DNS name.

MyInstances

The next step was to connect to my virtual machine, which involved some security configuration. First of all I needed a key and this was generated for me when I launched the virtual machine, secondly I needed to open up the virtual machine’s firewall to allow me administrative access so I added an entry on the Security Group page to enable SSH.

SecurityGroup

My only stumbling block came when I tried to connect to the virtual machine using Putty as an SSH client in Windows in that Putty didn’t recognize the key that EC2 had generated for me when I launched the virtual machine. It turned out that I needed to convert the key to a different format by using Puttygen. With that sorted out I could run a command shell on the virtual machine, and copy files to and from the virtual machine using PSCP.

Installing Calibre on Ubuntu turned out to a single command:

sudo apt-get install calibre

Finally I could set up a scheduled command using crontab to generate and email my Kindle newsfeed every day at 6am.

Conclusions

To summarize what I learnt from my first use of Amazon EC2:

  • Setting up a virtual machine in the cloud is very straight-forward with the Amazon Web Services web-based management console. It also looked as if would be quite simple using the command line tools.
  • Choosing a suitable base operating system is more difficult. Someone else has installed the OS and a selection of software before you start, you really need to know your way round the OS to be sure that it’s secure and properly configured. In fact you probably want to install it yourself, which is possible, but a bit more complicated. Also, it’s down to you to make sure everything is kept up to date with patches etc.
  • Given the choice of operating systems available, you can run just about any piece of software you like (even applications with GUIs if you use technologies like Remote Desktop or VNC). However, there’s no guarantee that it will scale — in order for an application to scale it must be able to run in multiple virtual machines simultaneously, and probably be designed to use one or more of the scalable storage services like Amazon SimpleDB or Amazon Simple Storage Service.

Friday 3 December 2010

Where Next with the Cloud?

I’ve spent most of this year embedded with a team run by Eugenio Pace in the patterns & practices group at Microsoft working on three books (with more to come). The first two have already been published — see the links on the right. You can also view the content on MSDN:

The first book includes an introduction to the Windows Azure Platform, and then describes how the fictional Adatum company migrates its existing ASP.NET expense reporting application to the cloud. The book looks at the mechanics of how Adatum performs the migration as well as examining the significant design decisions made by Adatum, the trade-offs it had to consider, and the cost implications. For example, the original, on-premises application used SQL Server as its data store. Adatum had to decide whether to go with SQL Azure for the cloud-based version of the application, which would be simple to implement, or expend more development effort to port the storage functionality in the application to Windows Azure table and blob storage.

The second book describes a “green field” scenario where the fictional Tailspin company is developing an online surveys application. With a new application, Tailspin in not constrained by any existing design decisions or implementation choices, but can chose which features of the Windows Azure platform to use. The design decisions addressed in the book include how to make the Surveys application a multi-tenant cloud application, and how to make the application scale on demand (for example to handle a customer creating a survey that they expect to get a million responses to in the week before Christmas). The Tailspin Surveys application will make a reappearance in a forthcoming book on Windows Phone 7 development, where a Windows Phone 7 device will become a client application enabling users to complete surveys on their phone.

Both books also have companion, downloadable code that you can use to explore exactly how these two companies chose to implement their applications for the Windows Azure platform, and hands-on labs that will guide you through some of the specific areas of the the implementations.

Next year, there will be third book on Windows Azure that will provide coverage of some of Windows Azure platform functionality not used by Adatum and Tailspin, for example the Access Control Service, and bring things up to date with some of the new features appearing in in the Windows Azure platform.

Thursday 2 December 2010

Serious Guidance for Serious SharePoint Developers


Earlier this year, I was lucky enough to spend several months working with the patterns & practices team at Microsoft, producing guidance for developers and architects on working with SharePoint 2010—check out the Developing Applications for SharePoint 2010 pages on MSDN. The guidance includes:


  • Documentation that provides deep technical insights into core aspects of SharePoint 2010 development
  • Deployable reference implementations with a realistic level of complexity
  • "How To" documentation on tricky tasks
  • A library of utility classes that you can use in your own SharePoint applications

The guidance is primarily aimed at experienced SharePoint developers and architects who want a more sophisticated level of guidance. Rather than explaining the basics of SharePoint development, it aims to give you the information and resources you need to make effective architectural and implementation decisions. For example, the topics on sandboxed solutions provide a detailed insight into how sandboxed assemblies are loaded and executed, how resource monitoring and throttling criteria are applied, and how low-privileged process accounts together with CAS policies restrict the functionality of sandboxed solutions. In light of these insights, it goes on to explore exactly what you can and can't do with sandboxed solutions. Patterns & practices go to great lengths to make sure their guidance has real world relevance—the core team included two SharePoint MVPs, Todd Baginski and Rob Bogue, and every chapter and component was reviewed by an external "advisory council" consisting of leading industry figures in the world of SharePoint.


We've now distilled the core content from this guidance into a new book, Designing Solutions for SharePoint 2010. If you're new to SharePoint development, this probably isn't the book for you. However, if you already know your SPSite and your SPWeb and you're looking for deeper technical insights, then this could be a valuable addition to your bookshelf.


Tuesday 23 November 2010

Drupal 7 and SQL Server Spatial Data

In a previous post, I explored integration between Drupal 7 and SQL Server Reporting Services. In this post, I’ll examine how you can take advantage of the fact that Drupal 7 can be installed on SQL Server to store geographic data using SQL Server 2008’s spatial data support, and also how you can integrate Bing Maps and Twitter geographic data into your Drupal site.

Drupal and SQL Server Spatial Data Demo

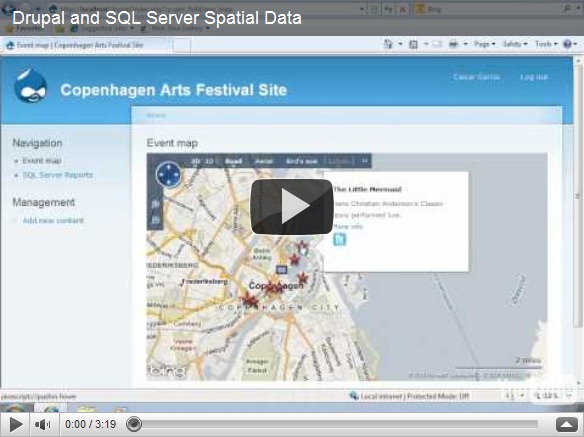
Microsoft introduced support for spatial data in SQL Server 2008 (see some of my past posts for details), and given that you can now install Drupal on Windows with a SQL Server content database, it makes sense to use this support to extend your Drupal site to include content with a geographical element. The scenario we decided to use when exploring this idea was a site for a local arts festival that includes the ability to publish details of events, including their location. However, you could easily adapt the idea for any content that has a location-based element. The video shows the solution we created (you can also view the video on YouTube).

Our solution not only incorporates spatial data that is stored in SQL Server, but also uses the Bing Maps control to visualize the spatial data, and retrieves tweets that include a geographic location from Twitter. This sort of “mash-up” approach where data and services from multiple sources on the Web are combined to create a rich user experience is the very essence of today’s most cutting edge Web applications, and when combined with the social/community-based publishing capabilities of Drupal it can be used to create some pretty compelling compelling solutions.

The diagram below shows the high-level architecture of the solution. Note that the SQL Server database forms the “data hub” of the application, storing the geographical data from both the Drupal content and the related tweets (which are retrieved and cached in the database periodically using the Cron scheduler in Drupal).

SpatialArchitecture

At the heart of the solution is a set of custom Drupal modules that we implemented in PHP. These are packages and installed in the Drupal site to add the required spatial data functionality. The first module we created, and the one on which the others all depend, is a module named GeoField that defines a Location field type that can be included in Drupal content types. The Location field type stores a geographical Longitude-latitude point in well-known text (WKT) format, which can easily be instantiated as a SQL Server geography data type instance. The module also defines a widget for setting Location values, which consists of a textbox and a Bing Maps control. Users can enter an address in the text box and geocode it using the Bing Maps API, or they can right-click a point on the map and reverse-geocode the address. The code to do the geocoding is implemented in JavaScript as described in a previous blog post. The following PHP functions define the field info and schema within Drupal:

function geo_field_field_info() {
  return array(
    'geo_field_Location' => array(
      'label' => t('Location Data'),
      'description' => t('A field for storing geographic data.'),
      'default_widget' => 'geo_field_bingmap',
      'default_formatter' => 'geo_field_simple_text',
    ),
  );
}

function geo_field_field_schema($field) {
  $columns = array(
    'location' => array('type' => 'varchar', 'length' => 255, 'not null' => FALSE),
  );
  $indexes = array(
    'location' => array('location'),
  );
  return array(
    'columns' => $columns,
    'indexes' => $indexes,
  );
}

The Bing Maps widget, and an alternative simple textbox-based widget, is defined with the following PHP code:

function geo_field_field_widget_form(&$form, &$form_state, $field, $instance, $langcode, $items, $delta, $element) {
   $value = isset($items[$delta]['location']) ? $items[$delta]['location'] : '';
  $element += array(
    '#delta' => $delta,
  );
  $element['location'] = array();

  switch ($instance['widget']['type']) {

    case 'geo_field_bingmap':
    drupal_add_js('
http://dev.virtualearth.net/mapcontrol/mapcontrol.ashx?v=6.3', 'external');
      $element['location'] += array(
        '#prefix' => '',
        '#attributes' => array('class' => array('edit-field-geomap')),
        '#attached' => array(
       
         'js' => array(drupal_get_path('module', 'geo_field') . '/BingMaps.js'),       
        ),
        '#suffix' => '<div class="bing-map-control form-item form-type-textfield"><label for="txtAddress">Address</label><input type="text" id="txtAddress" class="form-text bing-map-address" size="60"/><input type="button" value="Find" class="location-search-button form-submit" class="form-submit" /><br/><div id="mapDiv" class="bing-map-edit bing-map" style="position:relative; width:400px; height:300px;"></div></div>',
      );
     

    case 'geo_field_geotext':
      $element['location'] += array(
       '#prefix' => '<div class="geo_field_geotext" style=" margin-top:20px; border: thin solid #808080;"><p>Enter a location:</p>',
        '#type' => 'textfield',
        '#default_value' => $value,
        '#size' => 50,
        '#maxlength' => 255,
        '#suffix' => '</div>',
      );
      break;

     }
  return $element;
}

Note the reference to the Bing Maps API and to the BingMaps.js JavaScript file, which includes the code used to handle the user interaction with the Bing Maps control.

The next task was to create a GeoEvent module that defines a content type for a festival event. This content type includes a Location field as well as more standard Drupal fields, such as a title, image, description, tags, and a simple text field to specify the date and time of the event.

The final module to be created was the GeoMap module, which defines the Event Map page on which events and tweets are plotted. The code in this module includes the following function, which retrieves the events from the Drupal database and returns them as a GeoRSS feed that can be imported into the Bing Maps control by client-side JavaScript code.

function geo_map_events() {
    global $base_url, $language_content;
  
    $results = db_query(
        'SELECT r.title, b.body_value what, r.nid, w.[event_location_location] loc, geography::STPointFromText(w.[event_location_location], 4326).AsGml() [where] '.
        'FROM node_revision r '.
        'LEFT JOIN field_revision_body b ON r.nid = b.revision_id '.
        'JOIN field_revision_event_location w ON w.revision_id = r.nid '.
        'JOIN node n ON r.nid = n.nid '.
        'WHERE n.type = \'event\'');
   
    $items = '';
    $addedItems = 0;
    foreach ($results as $result) {
        // We have to add in the namespaces here else the Bing control
        // can't parse the content.
        $xml = str_replace('<', '<gml:', $result->where);
        $xml = str_replace('gml:/', '/gml:', $xml);
       
        $description = $result->what != '' ? $result->what . '&lt;br /&gt;' : '';
        $description .= '&lt;a href=\'index.php?q=node/' . $result->nid . '\'&gt;More info&lt;/a&gt; &lt;br /&gt;';
        $description .= '&lt;a href="#' . $result->loc . '" class="twitter-button" &gt; &lt;img src="modules/geo_field/images/twitter.png" alt="Show nearby tweets" /&gt; &lt;/a&gt;';
       
        $item_text = '<entry>'.
                    '<title>' . $result->title . '</title>'.
                    '<description>' . $description .'</description>'.
                    '<georss:where>' . $xml .
                    '</georss:where>'.
                  '</entry>';

        $items .= $item_text;
        $addedItems++;
    }

  if ($addedItems == 0) {
    $placeholder_text  ='<entry>' .
      '<title>Placeholder</title>'.
      '<description></description>'.
      '<georss:where><gml:Point xmlns="http://www.opengis.net/gml"><gml:pos>-90 0</gml:pos></gml:Point>'.
            '</georss:where>'.
            '</entry>';
    $items .= $placeholder_text;
  }
 
  $output  = "<?xml version=\"1.0\" encoding=\"utf-8\"?>\n";
  $output .= "<feed xmlns='http://www.w3.org/2005/Atom' xmlns:georss='http://www.georss.org/georss' xmlns:gml='http://www.opengis.net/gml'>\n";
  $output .=
        "<title>Festival Events</title>\n".
              "<subtitle>Events for the 2010 festival</subtitle>\n".
              "<author>\n".
                "<name>Drupal Administrator</name>\n".
              "</author>";
  $output .= $items;
  $output .= "</feed>\n";

  drupal_add_http_header('Content-Type', 'text/xml; charset=utf-8');
  print $output;
}

Note that the query used to retrieve the data uses the SQL Server geography type’s STPointFromText function to instantiate a geography instance from the WKT representation of each location, and the AsGml method to then convert that geography instance to Geographic Markup Language (GML) format. This enables the code to simply embed the GML representation of the location into the GeoRSS feed (since a GeoRSS feed is in effect an XML representation of a collection of GML entities). If no locations are found, a placeholder location is created to avoid returning an empty feed.

The client-side JavaScript to request this feed and display the results as a layer on the Bing Maps control is in a  script file named EventMaps.js, which is referenced by the Drupal page:

function showEvents() {
  eventLayer.DeleteAllShapes();
  var url = "index.php?q=geo_field/items_georss";
  var veLayerSpec = new VEShapeSourceSpecification(VEDataType.GeoRSS, url, eventLayer);
  map.ImportShapeLayerData(veLayerSpec, function(feed) {
        var numShapes = feed.GetShapeCount();
        for (c = 0; c < numShapes; c++) {
            var shape = feed.GetShapeByIndex(c);
     
      if (shape.GetDescription() == 'Placeholder' &&
          shape.GetTitle() == 'Placeholder') {
        eventLayer.DeleteAllShapes();
      }
     
            shape.SetCustomIcon("modules/geo_field/images/pin.png");
        }

    }, false);
   
    map.SetCenterAndZoom(new VELatLong(55.67630968987942, 12.569355145096778), 10);
}

Note that if the layer contains only a placeholder location (because there were no events), the location is deleted to produce an empty map.

The GeoMap module also includes a function that queries Twitter to return any tweets containing a specified hash-tag (which the administrator can set in the settings for the module). These tweets are then inserted into a table in the SQL Server database. The table includes a geography column in which the location of the tweet is stored.

function tweets_download() {
    $tweetsfeed = "http://search.twitter.com/search.json?q=%23" . variable_get('geomap_hashtag', 'drupalcon');
   
    $results = json_decode(file_get_contents($tweetsfeed), TRUE);
   
  // Insert items into the table if they're not already there.
    $insertquery =
        "IF NOT EXISTS ".
        "(SELECT * FROM dbo.tweets WHERE TwitterID = :tweetid1) ".
        "INSERT INTO dbo.Tweets VALUES " .
        "(:datetime, :tweeter, :content, geography::GeomFromGml(:location, 4326), :tweetid2)";
   
    foreach ($results['results'] as $tweet) {
        if ($tweet['geo'] != null) {
            $pointdetails =
                "<Point xmlns='http://www.opengis.net/gml'><pos>" .
                $tweet['geo']['coordinates'][0] . ' ' . $tweet['geo']['coordinates'][1] .
                "</pos></Point>";
               
            $timestamp = strtotime($tweet['created_at']);
            $sqldate = date('c', $timestamp);
           
            $sqldate = substr($sqldate, 0, strlen($sqldate) - 6);
       
            $params = array(
                    'tweetid1' => $tweet['id'],
                    'tweetid2' => $tweet['id'],
                    'datetime' => $sqldate,
                    'tweeter' => $tweet['from_user'],
                    'content' => $tweet['text'],
                    'location' => $pointdetails);
                           
            db_query(
                $insertquery,
                $params);
        }
    }
}

Note that the Transact-SQL query executed by the code uses the SQL Server geography data type’s GeomFromGml function to convert the value retrieved from Twitter into a geography instance before storing it in the table. This function is called by the Drupal Cron scheduler, so the table of tweets is updated periodically.

When the user clicks the Twitter icon for an individual event, the following PHP function is used to retrieve the tweets within 500m of the event and return them as a GeoRSS feed to be displayed on the map.

function geo_map_tweets_feed($location) {
  // Use the location functionality in MSSql to query all tweets near a given
  // location.
    $results = db_query(
        'SELECT    Tweeter + \' (\' + cast(TweetDateTime as nvarchar(50)) + \')\' as tweeter, '.
        'Tweet as tweet, '.
        'TweetLocation.AsGml() as [where] '.
        'FROM tweets '.
        'WHERE TweetLocation.STIntersects(geography::STPointFromText(\'POINT(' . $location . ')\', 4326).STBuffer(500)) = 1');
   
    $items = '';
    $found = false;
   
    foreach ($results as $result) {
        $found = true;
        $xml = str_replace('<', '<gml:', $result->where);
        $xml = str_replace('gml:/', '/gml:', $xml);

        $item_text = '<entry>'.
                    '<title>' . $result->tweeter . '</title>'.
                    '<description>' . $result->tweet .'</description>'.
                    '<georss:where>' . $xml .
                    '</georss:where>'.
                  '</entry>';

        $items .= $item_text;
    }
       
    if (!$found) {   
        $items = '<entry>'.
                    '<title>Placeholder</title>'.
                    '<description>Placeholder</description>'.
                    '<georss:where><gml:Point xmlns="http://www.opengis.net/gml"><gml:pos>-90 0</gml:pos></gml:Point>'.
                    '</georss:where>'.
                  '</entry>';
    }

  $output  = "<?xml version=\"1.0\" encoding=\"utf-8\"?>\n";
  $output .= "<feed xmlns='http://www.w3.org/2005/Atom' xmlns:georss='http://www.georss.org/georss' xmlns:gml='http://www.opengis.net/gml'>\n";
  $output .= "<title>Festival Events</title>\n".
             "<subtitle>Events for the 2010 festival</subtitle>\n".
              "<author>\n".
                "<name>Drupal Administrator</name>\n".
              "</author>";
  $output .= $items;
  $output .= "</feed>\n";

  drupal_add_http_header('Content-Type', 'text/xml; charset=utf-8');
  print $output;   
}

Note that the WHERE clause of the Transact-SQL query executed by the code uses the STIntersects and STBuffer methods of the geography data type to find tweets within a 500m buffer of the event (which is instantiated as a geography instance by using the STPointFromText method as before).

As with the Reporting Services demo I blogged about previously, this solution we built was based on pre-beta releases of Drupal 7 and the related SQL Server driver for PDO and SQL Server module. To avoid the inevitable versioning issues that tend to arise with pre-release code dependencies, I haven’t includes the full source code. The plan is to publish it on CodePlex when the final release of Drupal 7 and the associated SQL Server components is available. Until then, hopefully you’ll find this article useful as an insight into the kinds of spatial data solutions you can build with Drupal and SQL Server.

Drupal 7 and SQL Server Reporting Services

Drupal is a popular content management system that until relatively recently has been associated more or less exclusively with the LAMP (Linux, Apache, MySQL, and PHP) Web development stack. However, Acquia Drupal is now available for Windows and can be installed with the Microsoft Web Platform Installer, and at DrupalCon in San Francisco, it was announced that a new SQL Server PHP driver for PDO and a SQL Server module for Drupal 7 would be released, enabling Drupal site data to be hosted in SQL Server. You can download a pre-release version of a Drupal and SQL Server package from here.

Drupal and Reporting Services Demo

Drupal is highly extensible through its PHP-based modular architecture, and SQL Server includes a wealth of features that could potentially enhance the value of a community-based content site, so given that you can now install Drupal with SQL Server, it seemed logical to do some investigation into how you can integrate some of the capabilities of SQL Server into a Drupal site.

Perhaps the most obvious starting point is to integrate Reporting Services into a Drupal site to create a sort of “Community Dashboard” that includes reports showing content and author related activity within the site. SQL Server Express Edition with Advanced Services includes Reporting Services for free, and the SQL Server Reporting Services SDK for PHP provides a framework for accessing Reporting Services from PHP-based applications. The video shows the Drupal solution we created using these technologies (you can also view this video on YouTube).

The demo actually shows “bi-directional” integration between Drupal and SQL Server Reporting Services in the sense that not only does the site include a custom PHP module to “pull” the reports from Reporting Services into the Drupal site user interface, the reports themselves query data in the underlying Drupal content database, which in this instance is hosted in SQL Server 2008 R2 Express Edition.

The diagram below shows the high-level architecture of the integration solution we created. Note that the Reporting Services instance contains two folders – one containing reports that show activity for all users, and another containing reports that are filtered based on the current Drupal user’s ID. The custom module in the Drupal site ascertains whether the current user is an administrator, and if not retrieves the current user’s ID via the Drupal PHP API and passes it as a hidden parameter when retrieving the reports.

Reporting Application Architecture

The reports query the tables in the Drupal content database. For example, the following query is used to retrieve the data for the Content Activity report:

SELECT n.Title Page,
       cast(dateadd(ss,n.created,'1/1/1970') as Date) CreatedDate,
       u.name Author,
       c.[Subject] Comment,
       uc.name [Commenter],
       cast(dateadd(ss,c.created,'1/1/1970') as Date) CommentDate,
       cn.totalcount PageViews
FROM dbo.Node n
JOIN dbo.Users u ON n.[uid] = u.[uid]
LEFT JOIN dbo.Comment c ON n.nid = c.nid
LEFT JOIN dbo.Users uc ON c.[uid] = uc.[uid]
LEFT JOIN node_counter cn ON n.nid = cn.nid
WHERE MONTH(cast(dateadd(ss,n.created,'1/1/1970') as Date)) = @Month
AND YEAR(cast(dateadd(ss,n.created,'1/1/1970') as Date)) = CONVERT(char(4),@Year)

Note that the date values in the Drupal database are stored in the standard UNIX format (the number of seconds since 1/1/1970), and so need to be cast to an appropriate SQL Server data type (we’ve used the Date datatype).

Our custom module code uses the SQL Server Reporting Services SDK for PHP to connect to and retrieve information from Reporting Services. For example, the following code is used to retrieve a list of available reports in the appropriate folder in Reporting Services (depending on whether or not the user is an administrator):

/*
  connect to SQL Server Reporting Services and retrieve a list of available reports
  */
function getReports(){
module_load_include('php', 'ssreport', 'bin/SSRSReport');
    
    $reports = array();
try
{
    $ssrs_report =  new SSRSReport(new Credentials(variable_get('ssreport_user'), variable_get('ssreport_password')), variable_get('ssreport_url'));
    $childPath = "";
 
// if user is admin then load from community dashboard
if (user_access('Administer site configuration')){
   $childPath = variable_get('ssreport_primary');
}
else{
// load from personal dashboard
   $childPath =  variable_get('ssreport_secondary');
}

$catalogItems = $ssrs_report->ListChildren($childPath, true);

foreach ($catalogItems as $catalogItem) {

if ($catalogItem->Type == ItemTypeEnum::$Report) {
$reports[$catalogItem->Name] = $catalogItem->Name;


}
}

}catch(SSRSReportException $serviceException)
{
    drupal_set_message($serviceException);
}
return $reports;

}

Note that the code uses a number of variable_get calls to retrieve global variables that are set in the Drupal administrative (such as the credentials to access the Reporting Services instance, the URL of the Reporting Services Web service, and the path to the CommunityDashboard and PersonalDashboard folders). Finally, the code uses the SSRSReport.ListChildren method provided by the SQL Server Reporting Services SDK for PHP API to retrieve the list of reports.

When a user selects a report, the following PHP function is used to retrieve the list of parameters that the report expects:

$rep=NULL;
if (user_access('Administer site configuration')){

$rep = t(variable_get('ssreport_primary').'/@report',array('@report' => $report));
 
}
else{
$rep = t(variable_get('ssreport_secondary').'/@report',array('@report' => $report));

}

// connect to SQL Server Reporting Services using the credentials and URL supplied in the administrative dashboard
$rs = new SSRSReport(new Credentials(variable_get('ssreport_user'), variable_get('ssreport_password')),variable_get('ssreport_url'));
$params = array();
  try
{
// get the parameters for the specified report
$reportParameters = $rs ->GetReportParameters($rep, null, true, null,     null);
    
$params = array();
        
foreach($reportParameters as $reportParameter)
            
{
    array_push($params,$reportParameter->Name);            
   
}

Finally, the following code is used to render the selected report in the Drupal user interface:

$rs = new SSRSReport(new Credentials(variable_get('ssreport_user'), variable_get('ssreport_password')),variable_get('ssreport_url'));
//get the report params array
  $path = drupal_get_path('module','report_services');

$reportParameters = $rs ->GetReportParameters($rep, null, true, null,     null);
    
$params = array();
        
foreach($reportParameters as $reportParameter)
{
  //code to set the parameter values

}

       $rs->SetExecutionParameters2($parameters);
   

    // delete existing image files
    $dirname = './images/';
   $dir_handle = opendir($dirname);
   if (!$dir_handle)
      return false;
   while($file = readdir($dir_handle)) {
      if ($file != "." && $file != "..") {
         if (!is_dir($dirname."/".$file))
            unlink($dirname."/".$file);
         else
            delete_directory($dirname.'/'.$file);    
      }
   }
   closedir($dir_handle);

    $htmlFormat = new RenderAsHTML();

  $htmlFormat->StreamRoot = './images/';
 
  $result_html = $rs->Render2($htmlFormat,PageCountModeEnum::$Estimate,$Extension,$MimeType,$Encoding,$Warnings,$StreamIds);

      $i = 0;

      // handle the images by writing them to the temp images folder
      foreach ($StreamIds as $StreamId){

$result_image = $rs->RenderStream($htmlFormat,$StreamIds[$i],$Encoding,$MimeType);

if (!$handle = fopen("./images/" . $StreamIds[$i] , 'wb'))
{
  echo "Cannot open file for writing output";
exit;
}
if (fwrite($handle, $result_image) === FALSE)
{
echo "Cannot write to file";
exit;
}
fclose($handle);
$i++;
}
// construct the html of the report
$content="<div align='center'>";

$content .="<style type='text/css'> td{border-top-width: 1px;border-top-style: solid;border-top-color: transparent;}</style>";
$content .="<div>";

$content .='<div>';
/* add the report content */
$content .=$result_html;
$content .='</div>';

$content .='</div>';

Note that the report is rendered as HTML by the Render2 method of the SSRSReport class provided by the SQL Server Reporting Services SDK for PHP . If the report contains any images or charts, the method generates image files for these and stores them in a specified folder – hence the requirements to clear out the image folder before rendering the report to remove any images left over from previously viewed reports. One gotcha that we found when implementing the solution was that these images are generated with no file extension, so we had to configure IIS to map the .* file name pattern to the Image/png MIME type.

The solution we built was based on pre-beta releases of Drupal 7 and the related SQL Server driver for PDO and SQL Server module. Given the complex dependencies on multiple pre-release software components, it seems foolhardy to publish the full source code for this solution until all of the dependencies are stabilized in a final release.  At that point, the plan is to update the code for our solution and publish it on CodePlex so that anyone can examine and extend it, so watch this space!

Thursday 18 November 2010

First Look at SQL Server Denali (Part 2 – Snippets)

This is a quick post for a new feature I discovered while writing the first “Denali” post. SQL Server “Denali” CTP1 is available for download from the Microsoft Download Center here.

The first post used a very straightforward While loop to demonstrate the improved debugging ability. You now have the ability to add code Snippets and Surround With Snippets.

If I use the code from the previous post without the loop it looks like this:

image

If you select and right-click the UPDATE statement you are presented with a dialog box which includes Insert Snippet and Surround With. By selecting Surround With you are presented with a further menu which comprises Begin, If, and While. You can also type your own freeform text. For this example we need a while loop and so you click While and press Enter. The statement is now surrounded by a WHILE snippet as shown:

image

It is now a short step to complete the statement and finish the code as follows:

image

It could be argued that this doesn’t save a lot of time because it has only typed three words, however it does prevent mistakes and correctly formats your SQL.

The snippets feature is similar except you are typically using it for new queries, or new statements in a query. In the previous example you might want to check the results of the query and because you run this often you have decided to create a view (it is at this point that I wish I created a query which had a purpose rather than something which just looped around for the sake of it. Anyway, I digress…).

By creating a new query, right-clicking and selecting Insert Snippet, you are presented with these options:

image

Scrolling down reveals View and when you click this the following snippet is created:

image

From here, you can quickly finish the syntax to arrive at the final statement:

image

Again, nothing amazing, but there is a wide range of snippets and I wouldn’t be surprised if this was expanded for release. This is actually a feature that comes from Visual Studio and therefore we also have the Code Snippets Manager which I personally think makes these features much more useful. If you go to the Tools menu and select Code Snippets Manager, you are presented with the following dialog box which allows you to add your own snippets:

image

Adding a snippet is not as straightforward as clicking Add and typing some SQL however. Snippets are XML files with a .snippet extension. If you want to create your own I would recommend searching for .snippet files and using an existing one as a starting point. The Create View snippet has the following syntax:

image

A bit of editing (and bad highlighting) gets you here:

image

If you now save this in the Snippets folder in My Documents with a .snippet extension, you are ready to add it. Return to Code Snippet Manager and click Add. Select your snippets folder and it will appear as a folder in the snippet list. Now you can add a snippet in the standard way, but have your own snippet:

image

Now there are real benefits from snippets by creating your own standardized SQL. I’m not aware of a more user-friendly method to create the snippets, but if anyone else has found one, I’d love to hear about it in the comments.

Wednesday 17 November 2010

First Look at SQL Server Denali (Part 1 – Debugging)

This is a first look at some of the new features in SQL Server “Denali” (which will most likely become SQL Server 2011).

SQL Server “Denali” CTP1 is available for download from the Microsoft Download Center here.  The press release is here.

image

Today, I’ll be focussing on the improved debugging functionality in SQL Server Management Studio. Following is a straightforward query to loop through the SalesOrderDetail table 10 times and add one to the UnitPrice each time (I’m not too concerned in this example with why you would want to do that!). I have filtered the query to rows which have a SalesOrderDetailID of less than 10.

image

We can now add a breakpoint on the UPDATE statement.

image

So far, nothing has changed, but if you right-click the breakpoint you can add limit the breakpoint by Location, Condition, and Hit Count, specify a filter for certain processes and specify what to do when a breakpoint is hit.

image

In this example, I have added a Condition of 2’">2’">2’">‘@counter>2’ and a HitCount of 2. Therefore the break should occur the second time the @counter value is over 2. If we run the code in debug mode we can see (after moving the panes around to get it in one screen capture) that value of @counter is 4 which is indeed the second time it has hit a value over 2.

image

This is a very straightforward example, but you can see that this makes the ability to use breakpoints much more powerful and therefore much more useful.

Tuesday 16 November 2010

The Async Modifier and the Await Operator - New Features in the Next Edition of C#

At the recent Professional Developers' Conference, Anders Hejlsberg gave a presentation that demonstrated some of the new language features that Microsoft are working on as part of the next version of Visual C# and Visual Basic. The thrust of the next build of these languages is oriented towards making it easier to write asynchronous code. These new features add native functionality to Visual C# and Visual Basic that are built on top of the TPL, introduced in the .NET Framework 4.0. This article concentrates on the syntax extensions proposed for C#, although similar extensions will be added to Visual Basic.

The purpose of the TPL is to make it easier to build applications that can take advantage of the now-commonplace crop of multicore processors to implement concurrency and multithreading. To recap, using the TPL you can implement a concurrent operation by defining a Task object that references the code to be run concurrently. When you execute the task by using the Start method, the .NET Framework uses its own scheduling algorithm to allocate the Task to a thread and set this thread running at a time convenient to the operating system, when sufficient resources are available. This level of abstraction frees your code from the requirement to understand and manage the workload of your computer (for more information about Tasks, see the post Make Your Applications More Efficient with MultiTasking.)

If you need to perform another operation when a specific task completes, you have a couple of choices:

  1. You can manually wait for the task to complete by using one of the Wait methods exposed by the Task type. You can then initiate the new operation, possibly by defining another task.

  2. You can define a continuation. A continuation simply specifies an operation to be performed when a given task completes. The .NET Framework automatically executes the continuation operation as a task that it schedules when the original task finishes. For information about continuations, see the MSDN article TPL and Traditional .NET Asynchronous Programming.

However, although the TPL provides the Task type as an abstraction for a concurrent operation, it is still often necessary to write potentially awkward code to solve some of the common problems that developers frequently encounter when building applications that contain sections that may run concurrently. Additionally, bear in mind that the purpose of the TPL is to implement concurrency (typically by running multiple threads) whereas asynchronicity is a subtley different problem that may require coordinating operations that run on a single thread. This is where the async modifier and the await operator come into play. As an example, consider the following simple WPF window (the XAML definiton is also shown).


<Window x:Class="TestApp.MainWindow"
xmlns="http://schemas.microsoft.com/winfx/2006/xaml/presentation"
xmlns:x="http://schemas.microsoft.com/winfx/2006/xaml"
Title="Asynchronous Demonstration" Height="204" Width="525" ResizeMode="NoResize">
<Grid>
<Button Content="Perform Work Synchronously" Height="23" HorizontalAlignment="Left" Margin="15,32,0,0" Name="synchronous" VerticalAlignment="Top" Width="187" Click="synchronous_Click" />
<Rectangle Height="142" HorizontalAlignment="Left" Margin="214,12,0,0" Name="rectangle1" Stroke="Black" VerticalAlignment="Top" Width="280" />
<Label Content="Status:" Height="28" HorizontalAlignment="Left" Margin="223,27,0,0" Name="label1" VerticalAlignment="Top" />
<TextBox Height="23" HorizontalAlignment="Left" Margin="286,27,0,0" Name="status" VerticalAlignment="Top" Width="195" IsEnabled="False" />
<Label Content="Duration:" Height="28" HorizontalAlignment="Left" Margin="223,61,0,0" Name="label2" VerticalAlignment="Top" />
<TextBox Height="23" HorizontalAlignment="Left" IsEnabled="False" Margin="286,61,0,0" Name="duration" VerticalAlignment="Top" Width="195" />
<Button Content="Perform Work using Async Task" Height="23" HorizontalAlignment="Left" Margin="15,74,0,0" Name="taskBasedAsync" VerticalAlignment="Top" Width="187" Click="taskBasedAsync_Click" />
<Button Content="Perform Work using C# Async" Height="23" HorizontalAlignment="Left" Margin="15,114,0,0" Name="nativeAsync" VerticalAlignment="Top" Width="187" Click="nativeAsync_Click" />
</Grid>
</Window>

This window defines three buttons that each perform the same long-running operation, but by using a different mechanism. The first button performs the work synchronously, in a naive manner, as shown in the following code:

public partial class MainWindow : Window
{
...
private void synchronous_Click(object sender, RoutedEventArgs e)
{
duration.Clear();
status.Text = "Running - Synchronous";
Stopwatch watch = Stopwatch.StartNew();
DoWork();
duration.Text = string.Format("{0} ms", watch.ElapsedMilliseconds);
status.Text = "Completed - Synchronous";
}
...
private void DoWork()
{
Thread.SpinWait(Int32.MaxValue / 2);
}
...
}

This code displays the text "Running – Asynchronous" in the status text box in the right-hand portion of the window before starting a System.Diagnostics.Stopwatch object (the code uses this object to time the duration of the operation). The code then calls the DoWork method, which simply performs a busy wait for a few seconds to simulate a long-running operation, before displaying the time taken and updating the text in the status text box to "Completed – Synchronous". When you run this code, if you click the "Perform Work Synchronously" button, you should observe the following phenomena:

  • The Window becomes unresponsive while the DoWork method runs; you cannot even move the window.

  • The status text box never actually displays the message "Running – Synchronous". The contents of this text box are only updated when the synchronous_Click method completes, after the contents of the status text box has been overwritten with the message "Completed - Synchronous".

Both of these issues are related to the same problem; the thread running the event loop that waits for Windows messages and handles them is kept busy by the DoWork method, and cannot process any events (such as requests to move the Window) until the synchronous_Click method finishes. Similarly, Windows cannot update the display until the thread running the event loop has finished the synchronous_Click method, so the status text box never displays the text "Running – Synchronous", only the message "Completed - Synchronous".

The usual strategy to avoid these problems and ensure that the user interface remains responsive while the application performs a long-running operation is to run this operation on a separate thread, thus freeing the thread running the Windows event loop to process other messages. You can achieve this with the TPL by using code such as the taskBasedAsync_Click method in the following example. This is the code for the "Perform Work using Async Task" button shown in the earlier image:

public partial class MainWindow : Window
{
...
private void taskBasedAsync_Click(object sender, RoutedEventArgs e)
{
duration.Clear();
status.Text = "Running - Async, Task-Based";
Task t = new Task(() => DoWork());
Stopwatch watch = Stopwatch.StartNew();
t.ContinueWith((task) => UpdateStatus(watch, "Completed - Async, Task-Based"));
t.Start();
}
...
private void DoWork()
{
Thread.SpinWait(Int32.MaxValue / 2);
}

private void UpdateStatus(Stopwatch watch, string message)
{
this.Dispatcher.Invoke(new Action(() =>
{
duration.Text = string.Format("{0} ms", watch.ElapsedMilliseconds);
status.Text = message;
}), DispatcherPriority.ApplicationIdle);
}
...
}

When you run the application and click the "Perform Work using Async Task" button, the user interface remains responsive, even while the DoWork method runs. This is because the DoWork method is performed by a task on a separate thread. Additionally, the status text box successfully displays the message "Running - Async, Task-Based" while the DoWork method runs. The tricky part is arranging for the display to be updated with the time taken to complete the DoWork method and the message " Completed - Async, Task-Based". This is achieved with a continuation that runs when the task performing the DoWork method completes. However, because this task runs on a different thread from that responsible for managing the user interface, it cannot directly modify the properties of the duration and status text boxes, but has to queue updates to the WPF Dispatcher object for the Window instead. When the thread handling the Windows event loop is free, it runs the code specified by the Dispatcher.Invoke method.

So, although this code works, it is messy; if you want to update the user interface, you have to define a continuation that invokes the Dispatch.Invoke method because the continuation does not run on the thread that owns the user interface elements. This is where the async modifier and await operator can prove very useful.

The async modifier to a method indicates that the method contains functionality that can be run asynchronously. The await operator specifies the point at which asynchronous operations can begin inside an async method. As a final example, consider the nativeAsync_Click method shown below. This method runs when the user clicks the "Perform Work using C# Async" button.

public partial class MainWindow : Window
{
...
private async void nativeAsync_Click(object sender, RoutedEventArgs e)
{
duration.Clear();
status.Text = "Running - Async, Native C#";
Task t = new Task(() => DoWork());
Stopwatch watch = Stopwatch.StartNew();
t.Start();
await t;
duration.Text = string.Format("{0} ms", watch.ElapsedMilliseconds);
status.Text = "Completed - Async, Native C#";
}
...
private void DoWork()
{
Thread.SpinWait(Int32.MaxValue / 2);
}
...
}

This code looks like a hybrid combination of the first two examples. It displays the message "Running – Async, Native C#" in the status text box before creating and running a task to perform the DoWork method on a separate thread. However, the await operator is where the clever stuff kicks in. Notice that the nativeAsync_Click method is defined with the async modifier. At run-time, the await operator causes the async method to return immediately from whence it was called without waiting for any subsequent code to run. When the subject of the await operator (the task running the DoWork method) completes, the nativeAsync_Click method resumes running at this point and the statements following the await operator are performed, updating the display with the time taken to perform the operation and the message " Completed - Async, Native C#". In fact, this magic is nothing more than an exercise in the reworking of your code by the C# compiler. When the C# compiler encounters the await operator in an async method, it effectively reformats the code that follows this operator as a continuation that runs on the same thread as the async method. And because the thread that was running the async method was the thread running the Windows event loop, it has direct access to the controls in the Window and can update them directly without routing them through the WPF Dispatcher object for the Window.

Although this approach looks quite simple at first glance, it is important to bear in mind a few points to avoid some possible misconceptions:

  • The async modifier does not signify that a method runs asynchronously on a separate thread. All it does is specify that the code in the method can be divided into one or more continuations. When these continuations run, they execute on the same thread as the original method call.

  • The await operator specifies the point at which the C# compiler can split the code into a continuation. The await operator itself expects its operand to be an awaitable object. An awaitable object is a type that provides the GetAwaiter method which returns an object that in turn provides the BeginAwait and EndAwait methods. The C# compiler converts your code into statements that uses these methods to create an appropriate continuation. The Visual Studio Async CTP provides extension methods for the Task class, and the code shown in the example above invokes the await operator on a Task object.

To conclude, the async modifier and await operator are powerful constructs that enable you to simplify asynchronous code, and as such they are natural partners with the TPL. Using the async and await keywords, you can concentrate on the logic of your application and let the compiler worry about how to divide your code into one or more continuations.